How to Plant Corn Seeds A Comprehensive Guide
Preparing the Soil for Planting
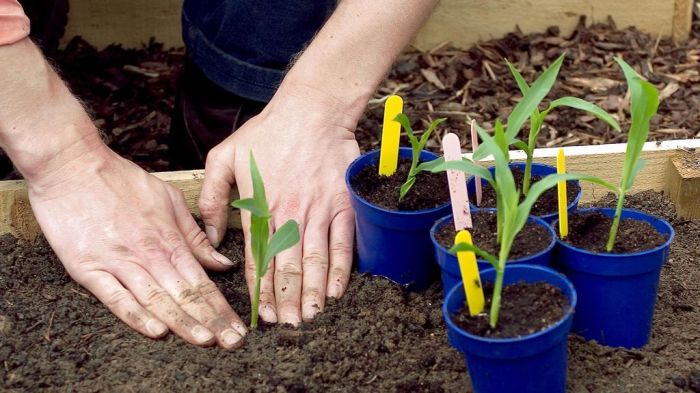
How to plant corn seeds – Getting your soil ready is the key to a bountiful corn harvest. Just like a chef carefully prepares ingredients before cooking a masterpiece, you need to prepare the soil to provide the perfect environment for your corn seeds to thrive. Think of it as creating a five-star hotel for your future corn plants! This involves understanding the ideal soil conditions and taking steps to achieve them.
Ideal Soil Conditions for Corn Growth
Corn prefers well-drained soil with a slightly acidic to neutral pH level, ideally between 6.0 and 6.8. Heavy clay soils, which retain too much water, can suffocate corn roots, while sandy soils, which drain too quickly, can leave roots thirsty. The ideal soil texture is a loam – a balanced mix of sand, silt, and clay, providing excellent drainage and water retention.
This balance ensures your corn plants have access to both air and water, essential for healthy root development and nutrient uptake. Imagine the perfect sponge – able to hold water but not become waterlogged. That’s the kind of soil texture you want for your corn.
Soil Testing and Amending
Before you even think about planting, a soil test is crucial. This inexpensive test, readily available through your local agricultural extension office or garden center, reveals your soil’s pH and nutrient levels. Based on the results, you can amend your soil with appropriate materials. For example, if your soil is too acidic (pH below 6.0), you can add lime to raise the pH.
Conversely, if it’s too alkaline (pH above 7.0), you can add elemental sulfur to lower it. Nutrient deficiencies, such as low levels of nitrogen, phosphorus, or potassium, can be addressed by incorporating organic matter like compost or applying fertilizers tailored to your soil’s needs. Think of it as giving your soil a complete health checkup and providing the necessary vitamins and minerals for optimal corn growth.
For instance, a soil test revealing low phosphorus could be addressed by adding bone meal to the soil.
Tilling Versus No-Till Methods for Corn Planting
Choosing between tilling and no-till methods depends on several factors, including your soil type, the scale of your planting, and your personal preferences. Both methods have their advantages and disadvantages.
Let’s weigh the pros and cons:
- Tilling: This traditional method involves plowing or tilling the soil to break up clods, remove weeds, and improve drainage. It can improve aeration and warm the soil more quickly in the spring. However, it can also lead to soil erosion, damage beneficial soil organisms, and increase weed pressure in the long run.
- No-Till: This method involves planting directly into the existing soil without plowing or tilling. It helps retain soil moisture, reduces erosion, and protects beneficial soil organisms. However, it may require more weed control and may not be suitable for all soil types or planting scales. Established no-till fields often require specialized planting equipment.
Preparing a Suitable Planting Bed
Creating a well-prepared planting bed is a multi-step process that ensures optimal corn growth. Here’s a step-by-step guide:
- Clear the Area: Remove any existing vegetation, rocks, or debris from the planting area.
- Soil Test and Amend: Conduct a soil test and amend the soil based on the results, as described above. This step is crucial for healthy plant development.
- Till or Prepare the Soil (if applicable): If you choose to till, plow or till the soil to a depth of 6-8 inches. If using no-till, prepare the planting rows with a suitable tool. This might involve using a specialized planter or even manually creating furrows.
- Level the Bed: Create a relatively level planting bed. A level surface ensures even seed depth and uniform germination.
- Water Thoroughly: Water the planting bed thoroughly before planting to ensure adequate moisture for seed germination.
Planting Corn Seeds
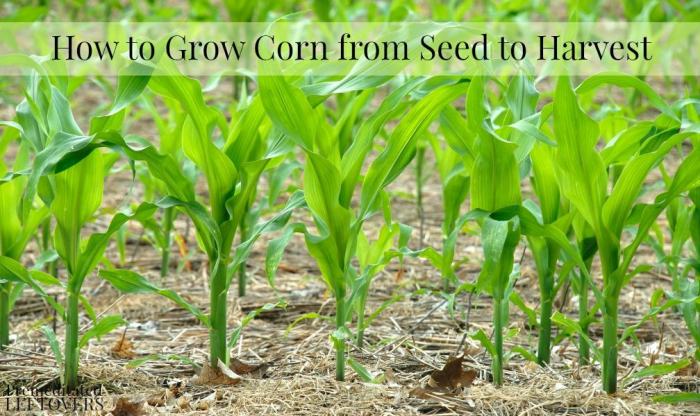
Getting your corn seeds into the ground is the exciting culmination of all your preparation! This section details the methods and techniques for successful corn planting, ensuring a bountiful harvest. Remember, the best method will depend on your specific circumstances, such as the size of your garden and available resources.
Corn Planting Methods
Choosing the right planting method is crucial for optimal corn growth. Direct seeding and transplanting are the two primary approaches, each with its own set of advantages and disadvantages.
| Method | Advantages | Disadvantages | Suitability |
|---|---|---|---|
| Direct Seeding | Simpler, faster, less labor-intensive; seeds establish roots directly in their final location, minimizing transplant shock. | Requires ideal soil conditions; susceptible to seed loss from pests or poor germination; less control over initial growth. | Larger fields, less time-sensitive planting schedules, good soil conditions. |
| Transplanting | Greater control over germination and seedling establishment; allows for starting seeds indoors for earlier harvests; better weed control in early stages; ideal for less-than-perfect soil conditions. | More labor-intensive; seedlings are more susceptible to damage during transplanting; requires more space and resources for starting seedlings. | Smaller gardens, areas with unpredictable weather, challenging soil conditions, desire for early harvest. |
Planting Depth and Spacing
Proper planting depth and spacing are essential for healthy corn growth. Planting too shallow can lead to drying out and poor germination, while planting too deep can prevent seedlings from emerging.
Planting depth should generally be 1-2 inches deep.
Spacing is also critical. Corn plants need adequate space to develop strong root systems and maximize sunlight absorption. For most corn varieties, spacing of 6-12 inches between plants within a row and 2-3 feet between rows is recommended. Adjust spacing based on the mature size of the specific corn variety you are planting.
Seed Placement and Coverage
Precise seed placement and adequate soil coverage are vital for successful germination. Seeds should be placed in loose, well-prepared soil, ensuring good contact with the soil particles for moisture uptake. Proper coverage protects seeds from birds, pests, and drying out, and ensures consistent soil temperature and moisture. Avoid over-compacting the soil, as this can restrict root growth.
Planting Corn Seeds Using a Hand Tool
Planting corn seeds by hand allows for precise placement and close monitoring of each seed.
- Dig a small hole with a trowel or your finger to the recommended depth.
- Place one seed in the hole.
- Gently cover the seed with soil, ensuring good soil-to-seed contact.
- Firm the soil gently around the seed.
- Repeat for each seed, maintaining the recommended spacing.
Planting Corn Seeds Using a Mechanical Planter
Mechanical planters are ideal for large-scale corn planting, offering efficiency and consistency.
- Adjust the planter to the desired planting depth and spacing according to the corn seed size and variety.
- Ensure the seed hopper is filled with corn seeds.
- Operate the planter according to the manufacturer’s instructions, maintaining a steady pace.
- Regularly check the planter’s operation to ensure consistent seed placement and depth.
- After planting, lightly roll the soil to ensure good seed-to-soil contact and reduce moisture loss.
Harvesting Corn
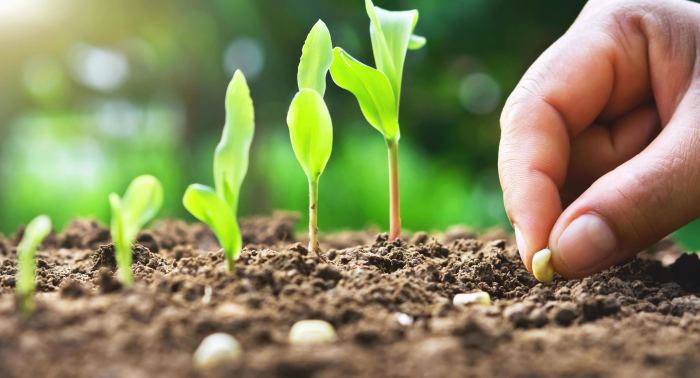
The moment of truth has arrived! After months of nurturing your corn plants, it’s time to reap the rewards of your hard work. Knowing when and how to harvest your corn is crucial for ensuring a bountiful and delicious yield. Let’s dive into the sweet science of corn harvesting.
Corn Maturity Signs and Optimal Harvesting Time
Determining the optimal harvest time is key to achieving the best flavor and quality. Several indicators signal that your corn is ready. The most reliable sign is the milk line. When you peel back the husk and press on a kernel, milky white liquid should appear. If the liquid is clear or watery, the corn is overripe.
Planting corn seeds is simple: loosen the soil, sow seeds an inch deep, and water gently. But for a truly thriving landscape, consider the surrounding environment; discover the ideal companions by researching the best trees to plant in Maryland , which can provide shade and improve soil health. This will ensure your corn, and your whole garden, flourishes!
Another indication is the husk itself – it should be dry and brown, with the kernels plump and tightly packed on the cob. Generally, corn is ready for harvest around 70-80 days after planting, but this can vary depending on the variety and growing conditions. Harvesting too early results in less-sweet corn, while harvesting too late leads to dry, starchy kernels.
Consider using a field guide or contacting your local agricultural extension office for more specific timing based on your variety and region.
Step-by-Step Corn Harvesting
Harvesting corn can be a satisfying experience, and with a few simple steps, you can ensure a successful harvest.
- Select the Ears: Begin by choosing ears that show the maturity signs described above – milky white liquid, dry husks, and plump kernels.
- Gently Peel Back the Husks: Carefully peel back the husks, avoiding breakage, to expose the kernels. Check for signs of pests or disease. Discard any damaged ears.
- Snap the Ear from the Stalk: Using your hand, gently snap the ear from the stalk at its base. A clean break indicates maturity. If it resists, the corn might not be ready.
- Remove the Silk: Pull away any remaining silk strands from the top of the ear.
- Inspect the Ear: Check the ear one final time for any imperfections before storing or processing.
Hand-Picking Corn
Hand-picking is ideal for smaller gardens or when you want to carefully select the best ears. It’s a labor-intensive method, but it allows for precise selection and minimizes damage.
- This method involves individually selecting and harvesting each ear of corn by hand, as described in the previous step-by-step guide.
- It’s best suited for small-scale operations where quality control is paramount.
- Expect a slower harvest process compared to mechanical harvesting.
Mechanical Corn Harvesting, How to plant corn seeds
For larger cornfields, mechanical harvesters significantly increase efficiency. These machines efficiently harvest large quantities of corn in a short time.
- Large-scale commercial operations typically employ specialized machinery designed to harvest corn rapidly and efficiently.
- These machines typically use a combination of mechanical picking and shelling to remove the ears from the stalks and separate the kernels.
- Mechanical harvesters can significantly reduce labor costs and increase overall yield, but require a substantial initial investment.
Post-Harvest Handling and Storage of Corn
Proper post-harvest handling is crucial for maintaining the quality and longevity of your corn.
Immediately after harvesting, remove any damaged or diseased ears. For fresh consumption, refrigerate the corn within a few hours of picking. To prolong the shelf life of corn, consider freezing or canning. For freezing, shuck the corn, blanch it in boiling water for a few minutes, and then quickly cool it in an ice bath before packaging and freezing.
Canning involves preserving corn in sterilized jars, following established food safety guidelines. Proper storage techniques will ensure your hard work translates into delicious meals for weeks or even months to come. Remember to always check for signs of spoilage before consuming stored corn.
Illustrative Examples
Seeing is believing! Let’s visualize the corn growing process and potential problems to better understand how to achieve a bountiful harvest. This section provides detailed descriptions and visual representations to aid in your corn-growing journey.
Healthy Corn Plant Development
A healthy corn plant progresses through several distinct stages, each with characteristic visual features. At the seedling stage (2-4 weeks), the plant is small, with a few narrow, light green leaves emerging from the soil. The stalk is thin and delicate. As it grows (4-8 weeks), the leaves become broader and darker green, and the stalk thickens and elongates.
The plant now stands several inches tall. During the vegetative stage (8-12 weeks), the plant continues to grow taller, with many large, dark green leaves. The stalk becomes sturdy and robust. Finally, during the reproductive stage (12+ weeks), the tell-tale corn ears emerge from the leaf axils, encased in protective husks. These ears gradually fill out, becoming heavier and longer as the kernels mature.
The leaves may begin to show signs of senescence (aging), turning slightly yellow or brown. A mature corn plant can easily reach 6-10 feet tall, depending on the variety.
Proper Spacing of Corn Plants
Optimal spacing ensures each plant receives sufficient sunlight, water, and nutrients for healthy growth. Imagine a row of corn plants spaced approximately 12-18 inches apart. This allows for adequate air circulation to prevent fungal diseases. Between rows, visualize a spacing of 24-36 inches. This wider spacing allows for easier access for cultivation, weeding, and harvesting.
Think of it like a well-organized grid, providing ample room for each plant to thrive. This spacing can vary slightly depending on the specific corn variety and growing conditions. A densely planted field will show stunted growth and smaller ears, while plants spaced too far apart may not fully utilize the available land.
Visual Appearance of Common Corn Pests and Diseases
Several pests and diseases can negatively impact corn growth. Corn borers, for example, can create tunnels within the stalk, weakening the plant and causing it to wilt or break. Visually, you might notice small holes in the stalks and leaves, along with frass (insect droppings). Another common pest is the corn rootworm, whose larvae feed on the roots, leading to stunted growth and reduced yield.
Affected plants may appear wilted or discolored, and the roots may show signs of damage upon inspection. Among diseases, fungal infections like gray leaf spot manifest as gray or brown lesions on the leaves, potentially spreading and severely impacting photosynthesis. These lesions often have a distinct, slightly raised border. Early detection and appropriate management practices are crucial for minimizing the impact of these pests and diseases on corn production.
A healthy field will exhibit uniform growth, vibrant green foliage, and sturdy stalks. In contrast, a field affected by pests or diseases will show uneven growth, discoloration, wilting, and potentially stunted or damaged plants.
Questions and Answers: How To Plant Corn Seeds
What is the best time of year to plant corn?
The best time to plant corn depends on your climate. Generally, wait until after the last frost and the soil has warmed to at least 60°F (15°C).
How often should I water my corn plants?
Water deeply and regularly, especially during dry spells. Aim for consistently moist soil, but avoid overwatering which can lead to root rot.
Can I save corn seeds from my harvest to plant next year?
You can save seeds from open-pollinated varieties, but hybrid corn seeds will not produce true-to-type plants in the following season.
What should I do if I see pests or diseases on my corn plants?
Identify the pest or disease and take appropriate action. This might include using organic pest control methods, applying an appropriate insecticide or fungicide (following label instructions carefully), or removing affected plants.

